
How Can We Help?
AZ-C1 Mode1

Question
I heard that the firmware of the AZ-C1 series has been updated to Ver. 2.00 and Mode 1 can no longer be used.
I was using Mode 1 in Ver1.00, what should I do?

Answer
First, export the project created with DirectSOFT in .txt format.
Next, edit the exported text data with a text editor such as “Notepad”.
(Type using mnemonic)
Then import the text data into DirectSOFT.
If you don’t understand the mnemonics, create a short sample ladder with DirectSOFT and check it.
Procedure
1.Turn on the power and check that “0-” is displayed on the 7-segment display.
2.Change the CPU module to W.E mode. (Set the RUN/W.E. switch to “W.E.” and press the R.ST button)
Confirm that “P—-” is displayed on the CPU’s 7-segment display.
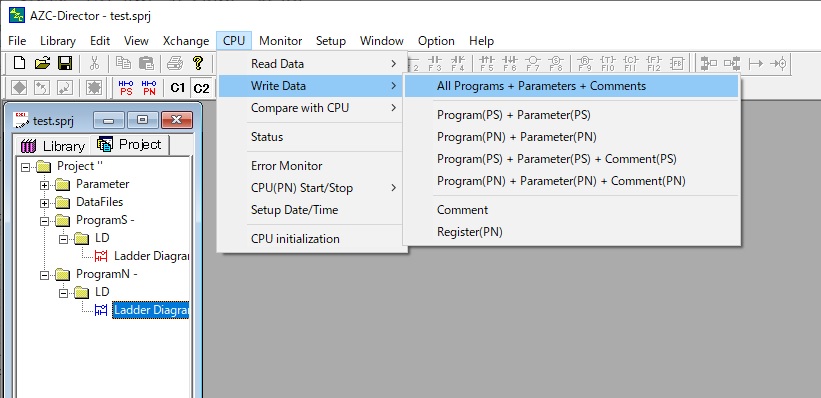
3.Write the sequence program created with Ver1.00.
(Execute CPU (C) -> Write to CPU (W) -> All programs + parameters + comments (G) from the menu)
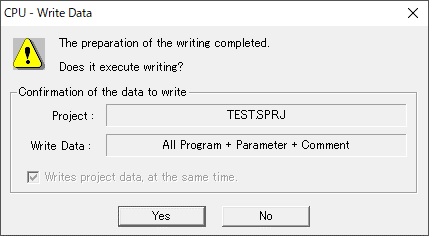
4.Check the written data and click Yes (Y).
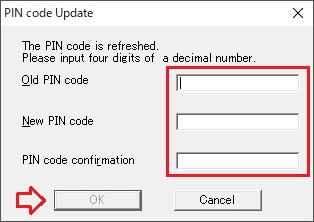
5.Enter the PIN code and click OK.
Old PIN code (O) Enter the initial value (0000).
New PIN code (N) Enter 4 digits other than 0000 (0001~9999).
Confirm new PIN code (R) Enter the same value as the new PIN code (N).
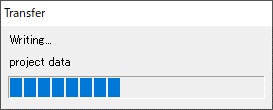
6.Start writing.
7.Click OK on the confirmation screen.
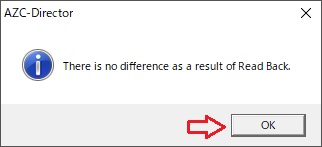
(Note) Do not stop writing at this stage. Doesn’t work properly.
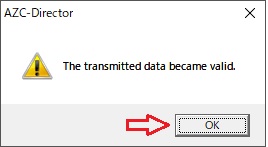
8.Click OK on the confirmation screen.
9.Switch the CPU module to RUN mode. (Set the RUN/W.E. switch to “RUN” and press the R.ST button)
If the 7-segment display shows “3- “, the work is complete. (- indicates that each segment of the 7 segments lights up sequentially)
2.Change the CPU module to W.E mode. (Set the RUN/W.E. switch to “W.E.” and press the R.ST button)
Confirm that “P—-” is displayed on the CPU’s 7-segment display.
3.Write the sequence program created with Ver1.00.
(Execute CPU (C) -> Write to CPU (W) -> All programs + parameters + comments (G) from the menu)
4.Check the written data and click Yes (Y).
5.Enter the PIN code and click OK.
Old PIN code (O) Enter the initial value (0000).
New PIN code (N) Enter 4 digits other than 0000 (0001~9999).
Confirm new PIN code (R) Enter the same value as the new PIN code (N).
6.Start writing.
7.Click OK on the confirmation screen.
(Note) Do not stop writing at this stage. Doesn’t work properly.
8.Click OK on the confirmation screen.
9.Switch the CPU module to RUN mode. (Set the RUN/W.E. switch to “RUN” and press the R.ST button)
If the 7-segment display shows “3- “, the work is complete. (- indicates that each segment of the 7 segments lights up sequentially)
Inquiry
technical support
Click here for inquiries by email
Click here for inquiries by email